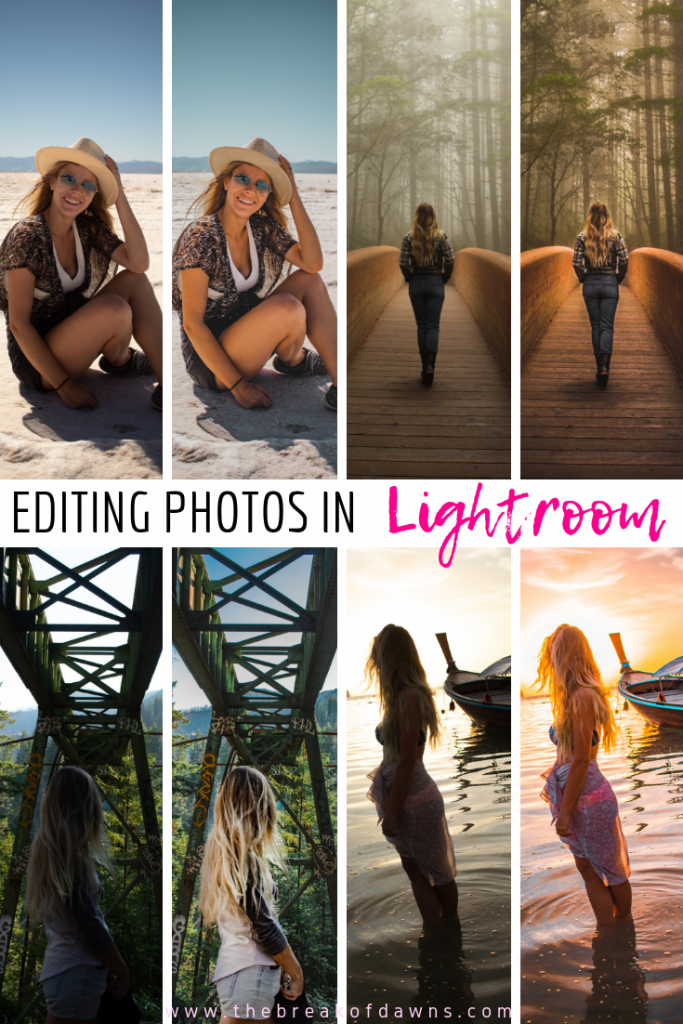
I’m pretty much a newb to the photo game. With the exception of a Canon Powershoot back in high school, I had zero experience in cameras before I began blogging. Trying to see if I could make the magic happen through edits, I began focusing on Lightroom editing.
Lightroom CC for desktop is $9.99 a month for a subscription or it’s free for mobile in the app store. I use the desktop version almost every single day and, since I prefer editing on my computer rather than my phone, the subscription is worth it to me.
In this blog post, I’ll first take you through my standard Lightroom editing process for every photo. I’ll then explain how to alter those edits for each shot.
Here’s Editing in Lightroom – Sharing All My Secrets:
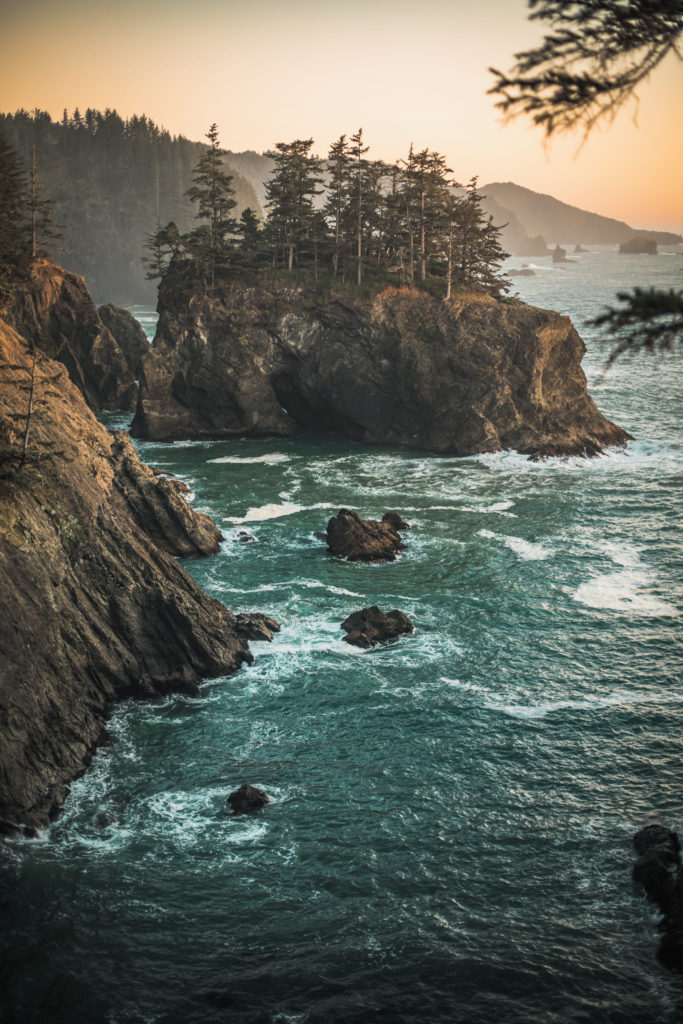
First Thing’s First
From exposure to white balance and aperture to ISO, the settings you use on your camera, how you shoot the photo and what you’re shooting it on could make the same photo differ from the next, even if the same edit is pasted to it. BUT, I’m not here to talk to you about how to shoot. I don’t feel credible enough as a photographer to give advice in that but I do feel credible enough to talk about my process after the shoot and what I do exactly to get that perfect edit.
In Lightroom editing, you have to find your own sort of style. Your preferences may be completely different than mine; I normally lean towards a matted look with higher warmth, vibrance and lowly saturated with deep shadows. You could like temperature more than warmth or lighter shadows instead of deep so, find what works best for you.
I personally don’t believe in using Photoshop for my photos. If you like visually enhancing your shots, go for it. My main focus during my editing process is to solely enhance the photo, bringing out colors that may have gotten washed out or introducing details that couldn’t be seen before the edit.
My Lightroom Editing Process for Every Photo
We’re going to use a blank canvased shot to show you the Lightroom editing process I go through on every photo.
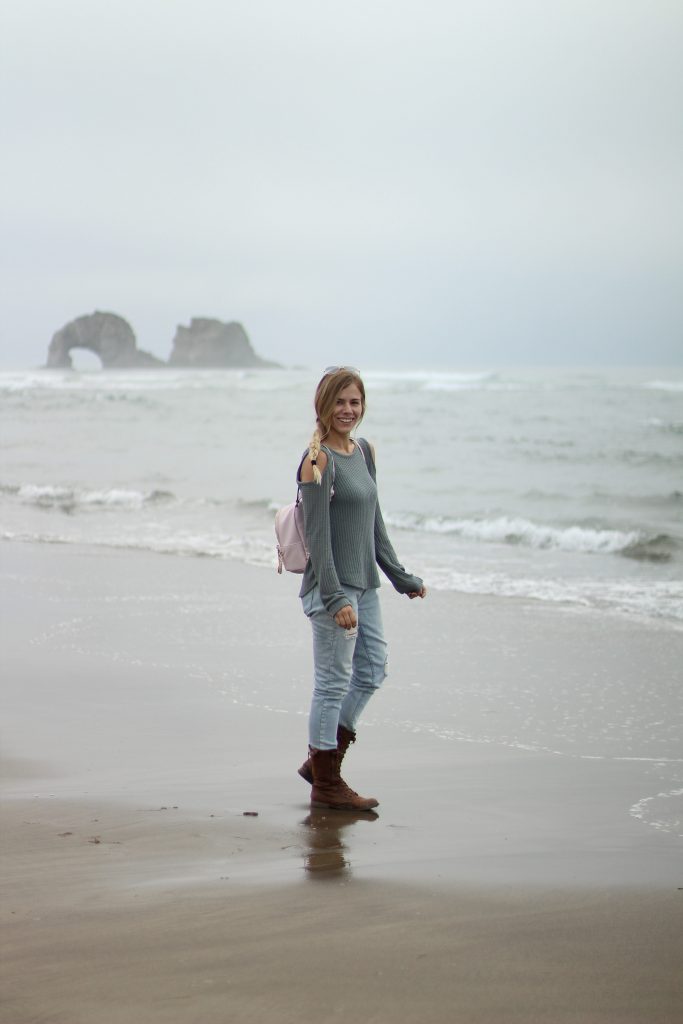
Straighten & Crop
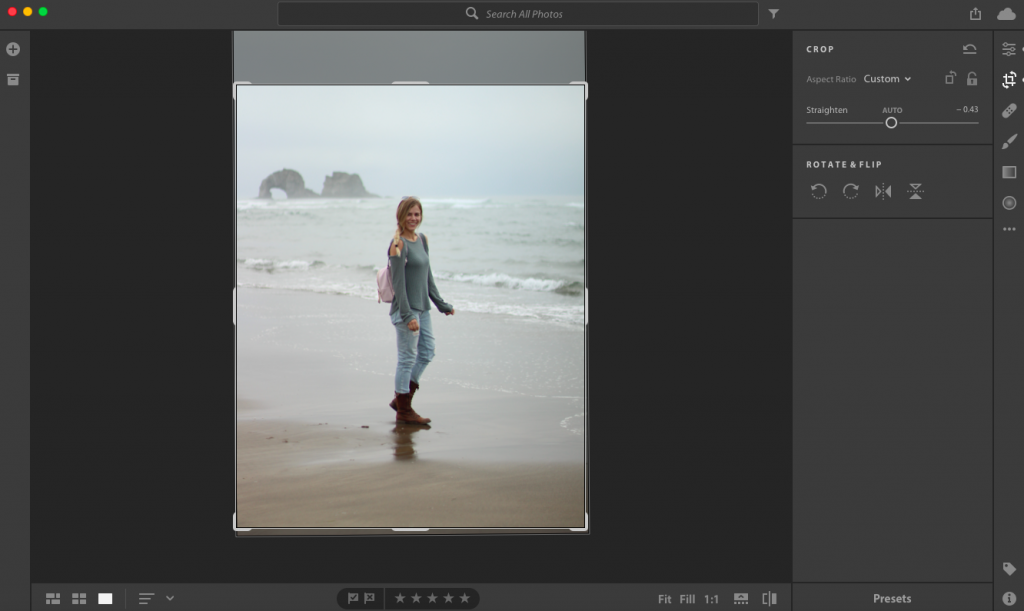
The first thing I always do is straighten and crop the photo so I can focus more on the edits. In the second column down from the right, use the slider to straighten the photo or unlock the padlock to create your own crop. Under the “Custom” drop down menu, you can pick from fixed dimensions for your photo.
Lighting
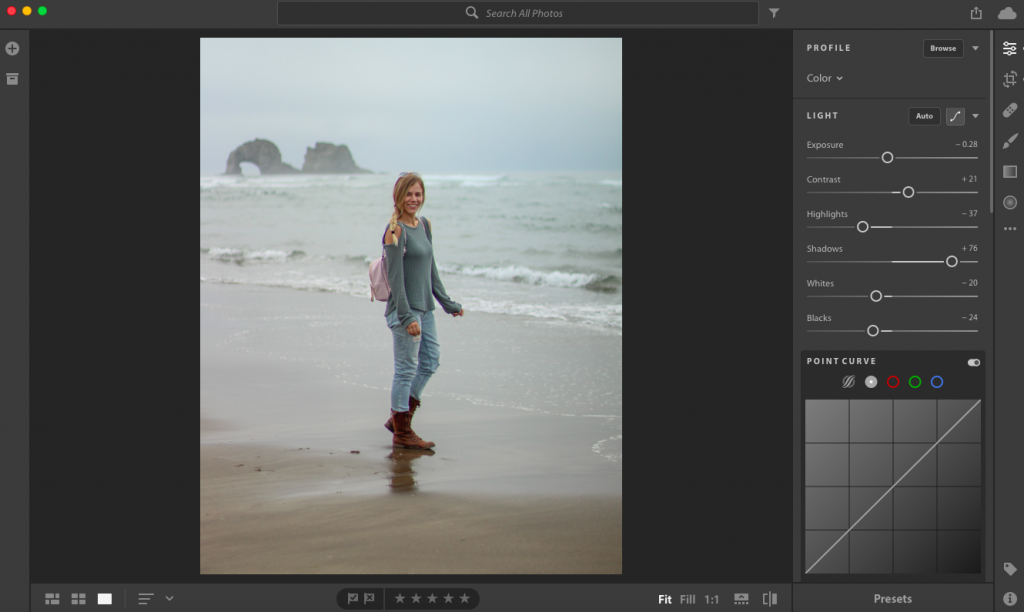
The next thing I do is work on the lighting. This photo is already quite overexposed so I brought the exposure down a hair. I usually always add a little contrast, bring the highlights down a tad, lift the shadows all the way up, decrease the whites and, to get those shadows to deepen, I bring down the blacks.
Point Curve
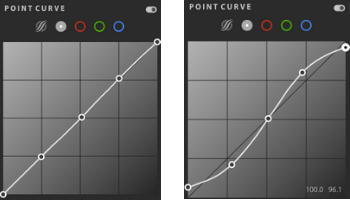
This is a part of the Lightroom editing process that so many people don’t consider and it is a BIG part in my editing as it affects the highlights and shadows directly. To get to the next step, select the white circle second in from the left and click each corner of the inside squares along the line to create 3 dots. Starting from the top right, I make an “S” shape. Raising the top dots heighten the highlights and pulling down the bottom dot deepens the shadows. To get my subtle matte, I lift the tail end of the S. Play around with the point curve to see what you can do with your photo.
Color
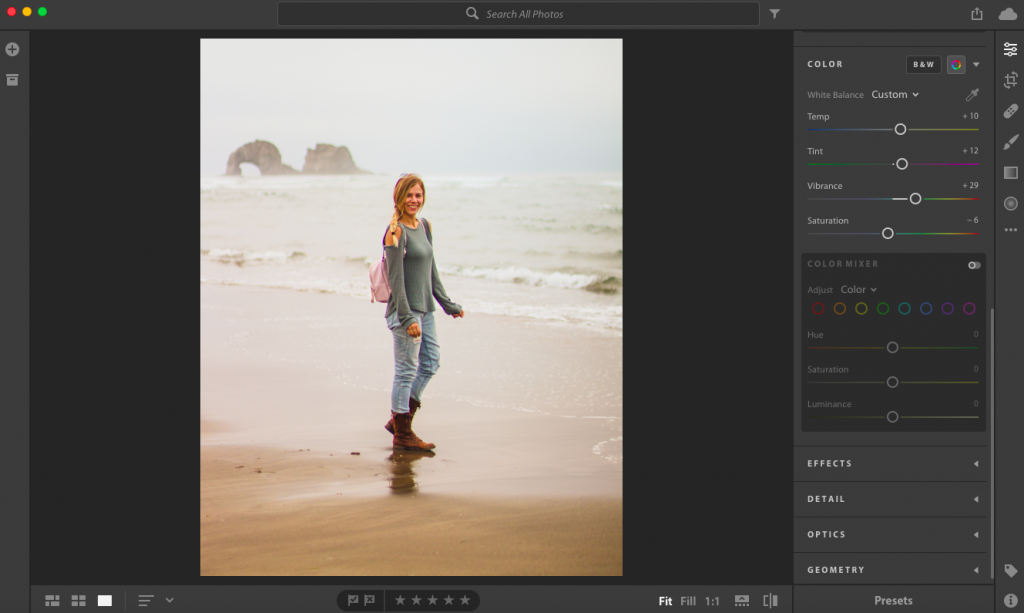
I almost always add warmth to my photos, unless the photo is already pretty yellow and I want to add more temperature. I also tint the photo red just a tad, heighten my vibrance and slightly decrease my saturation. Your photo’s coloring may look a little out of whack until we get to the next step…
Color Mixer
Now comes the most fun part of the whole Lightroom editing process: the color mixer! You will definitely have to play with your yellows and oranges a lot, especially if you’re a blonde like me. Sometimes I want to make my oranges more red but, if my face is showing in a photo, that doesn’t always work. You will find 3 different parts to the color mixer: hue, saturation & luminance. In a nutshell, hue changes the color you’re on, saturation either enhances that color or washes it out and luminance is the brightness of that color. You can click on each colored circle to adjust that specific color.
There aren’t many blues or greens in this overexposed shot so it looks like we’ll just need to play with the reds, oranges and yellows to see what we can get…
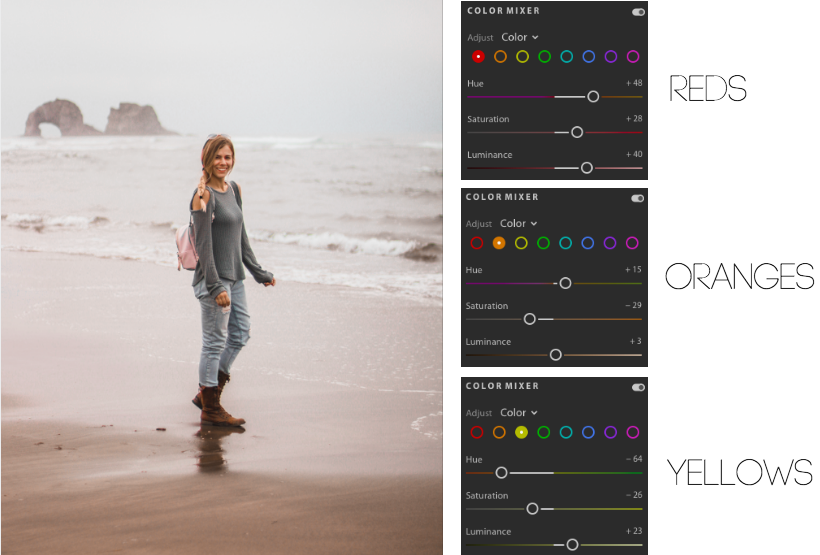
As you can see, by working with the color mixer I was able to even out my skin tone by decreasing the saturation of the orange yet changing the red hue to more orange. This also changed the color of the sand but we’ll get to how you can change that further below.
Effects
Another one of my best friends in my editing process is under the effects section. I usually bring up my clarity a tad until it looks right and I always add dehaze, at least a little. Vignette is also another factor I use pretty often.
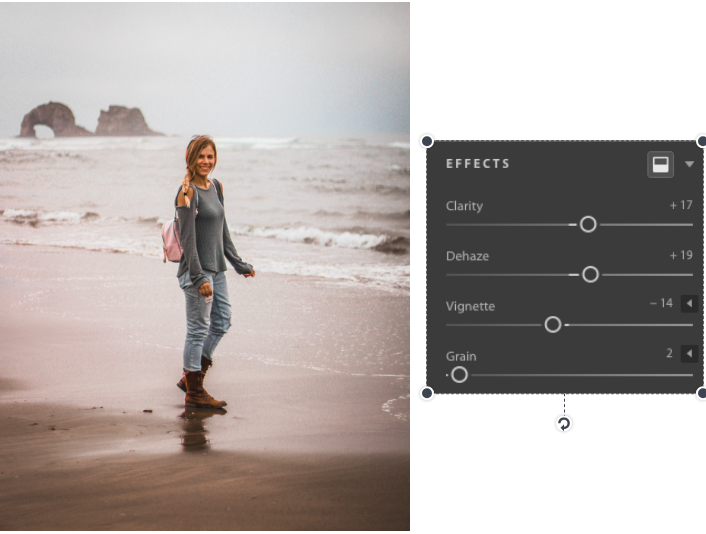
Split Toning
The split toning took in Lightroom editing is usually looked over by most people. I use it sometimes, depending on the photo I’m messing with. Play around with it a little, using the bar to adjust whether you want to add different tones to your shadows or highlights.
Details and Optics
I almost always add a little sharpening to my photos and sometimes noise reduction as well if it’s too grainy or spotty (that would come down to shooting errors most of the time). As far as optics go, it can be very important, especially if you’re shooting with a wide angle lens. Click on “Enable Lens Correction,” manually select your camera and the lens used should automatically pop up. This photo was shot with a 50 mm/f1.4 so not much distortion correction was needed but wide angle lenses tend to distort the image so this step is necessary in editing.

Brush
This is one of my favorite, but most tedious, parts of editing. Say you have a sunset picture and, obviously to get that beautiful sky, the photo was shot at low exposure. But what if there’s someone in the photo and you need to lighten them but not the rest of the picture? No problem! I’ll lighten myself in this photo…
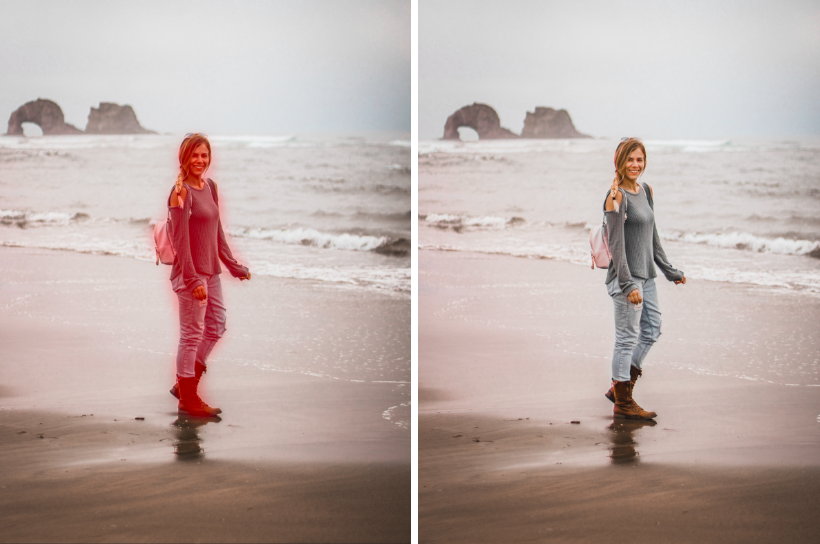
All I did was paint over myself with the Brush (use the eraser to make your lines perfect), brought my exposure up to 1.08, dropped the shadows to -20 and dropped the whites to -48. You can adjust your warmth, temperature and tint using this, as well as other details like clarity and dehaze. You can paint over the sky and heighten the temperature to make it more blue or paint the sand to make it more yellow, whatever you prefer.
VOILA! Here’s the final product of our edit:
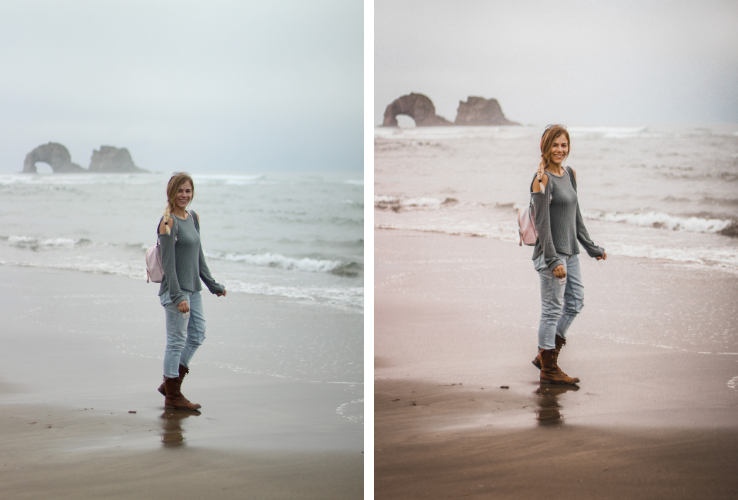
Using Selective Editing in Lightroom
Linear & Radial Gradient
Linear and Radial Gradient works the same way as the Brush but instead of painting, you’re adjusting the photo using the shapes provided. You can see how I used radial gradient over myself in this photo’s before and after:
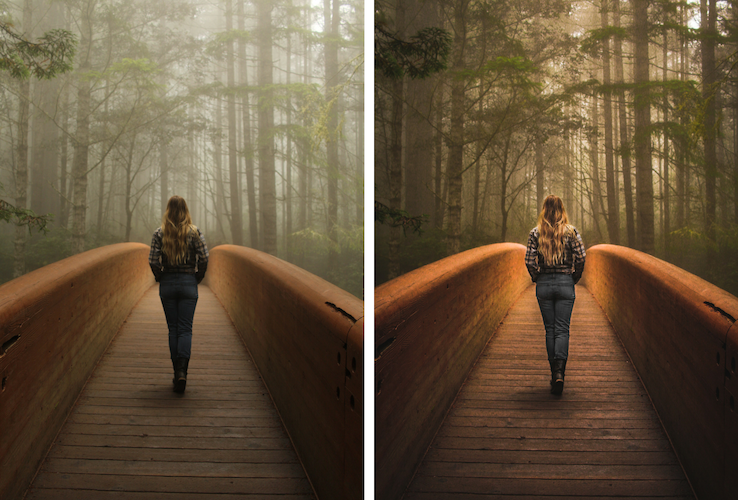
I simply made an oval shape around me and lightened the shadows, raising exposure.
Altering Lightroom Edits for Different Shots:
Like I said before, you will definitely have to adjust each photo to what you’re shooting. Here are a few different scenarios to get a little bit more in depth about altered Lightroom editing for different shots.
Sunsets
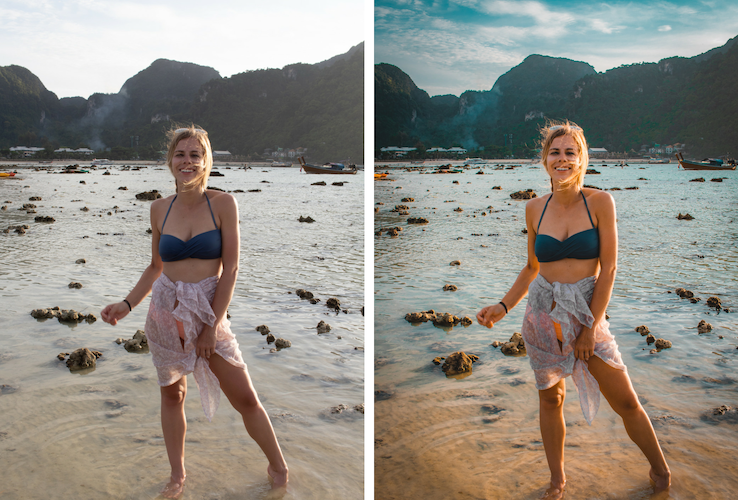
Sunsets are my favorite things to shoot (and edit!) and, depending on how the photo was captured, you should always decrease your highlights all the way and lighten your shadows, unless it becomes too grainy. I also usually always add warmth to the photo and that point curve will be your best friend for a sunset shot!
Here are a few of my favorite sunset before and afters:
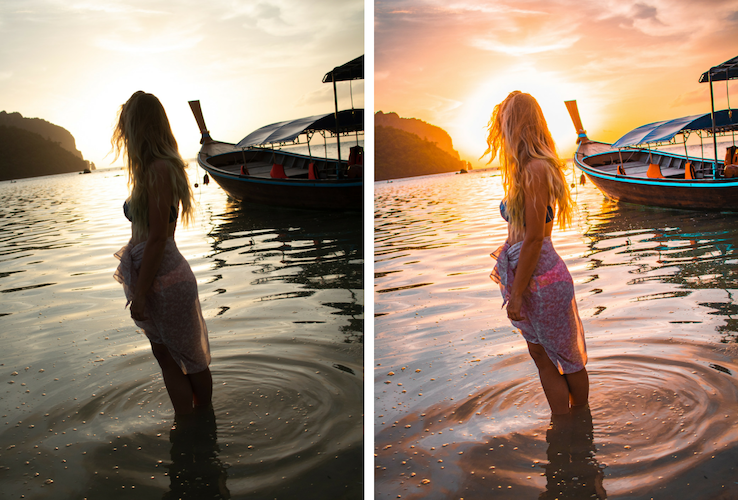
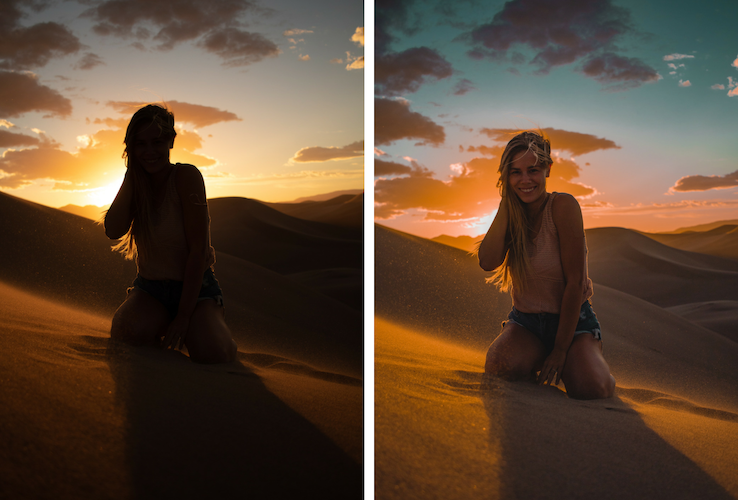
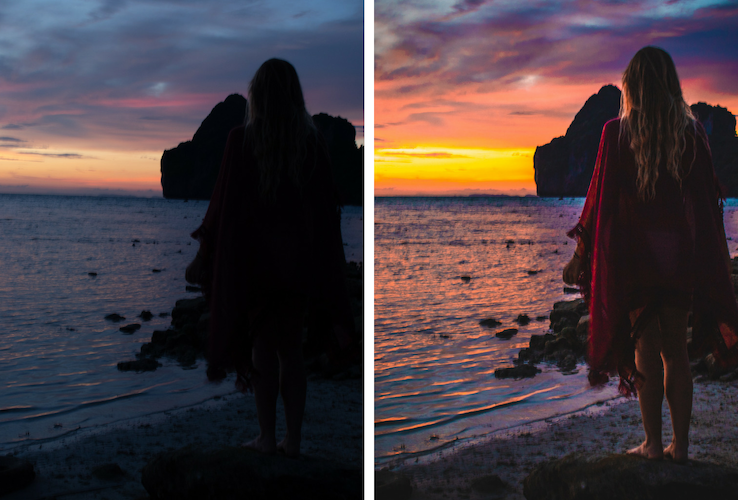
Blues
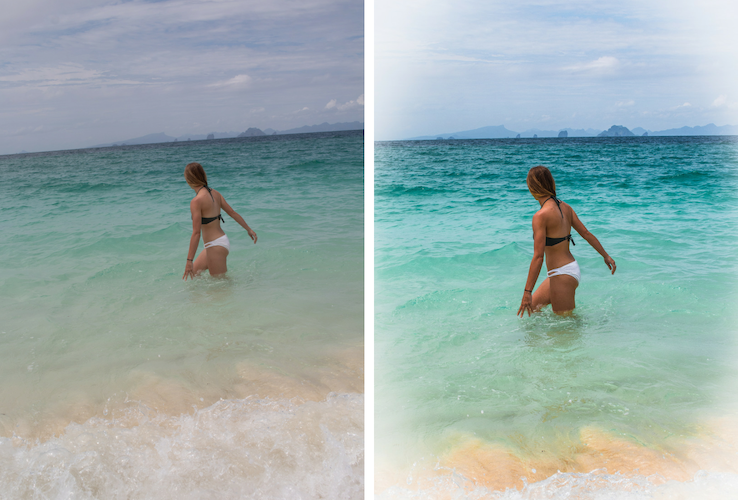
Blues really are quite hard to adjust because they all differ from each other. You could be looking out at a deep blue ocean, backed by a stretch of teal shoreline, all while having a vivid blue sky in the background. Things can get tricky and you definitely don’t want all of those different blues to look the same. This is when you can mess with your teal and blue color mixer settings. Using Brush helps too! If your sky is the same color as the background, try altering that via the Brush edit.
Check out these blue before & after edits:
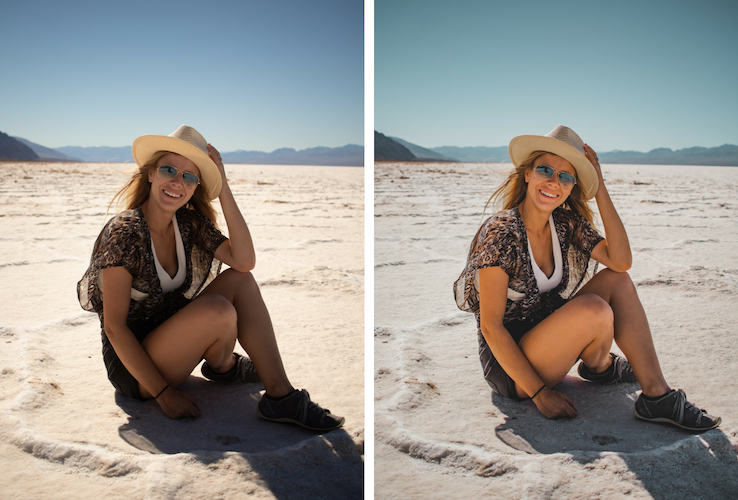
Greenery
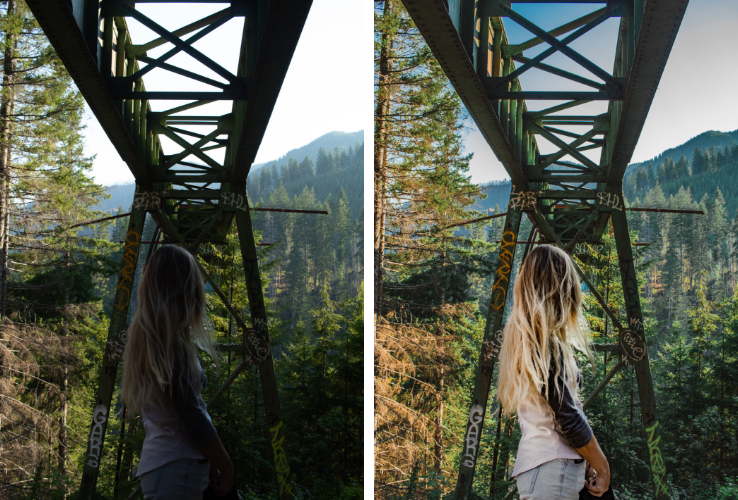
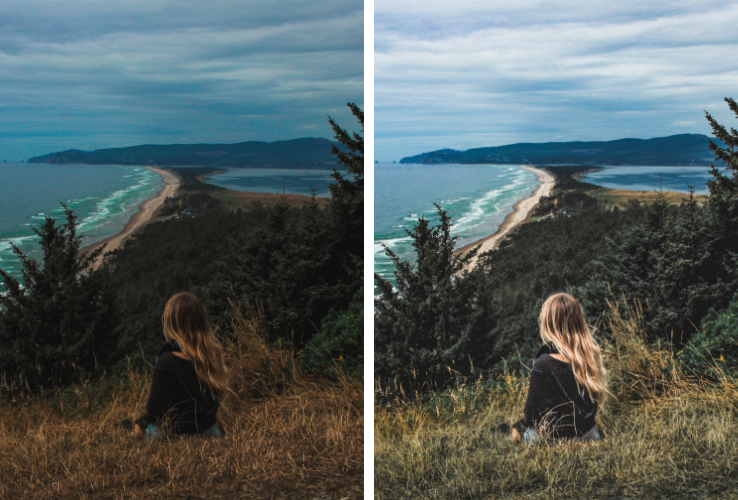
Trees can be a tough thing to edit, especially when looking out at a forest with evergreens and palm trees all in one. Your best bet for greenery edits is to play with your warmth and yellows on the color mixer. Sometimes I take the yellow hue to the right towards the green to help give more of a contrast between the greens on the screen. I usually always decrease my green saturation at least a bit as well.
Here are some greenery edits:
Alright guys, I think I pretty much brain-dumped my Lightroom editing knowledge on to all of you! I have had many questions about my editing and I hope that this will help some of you find your specific style. Feel free to email me any questions you may have and I’ll always do my best to help!
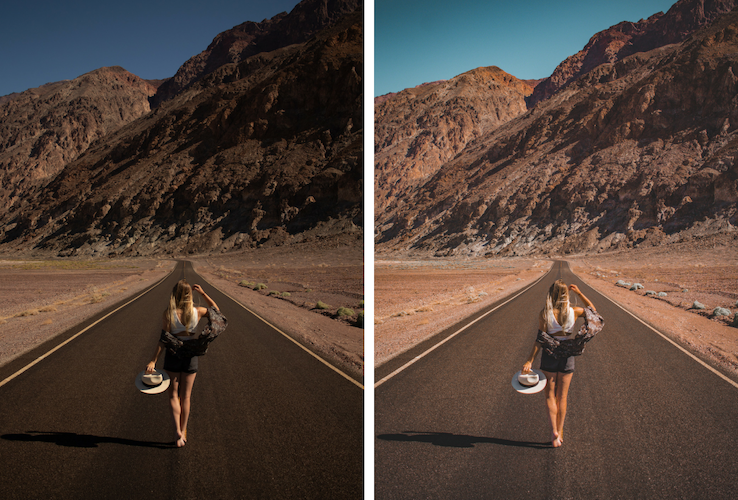
Until then, I’ll leave you with one more before and after because, well, I think they’re just so fun to look at!
Like This Post? Pin It!

| This post contains affiliate links which means that, at no extra cost to you, if you purchase one of these products I may receive a small commission. This helps me maintain my blog as a free space to you. Check out my Disclaimer for more info.

This is seriously such a good overview on how you edit! I love the brush feature. It helps so much! Your photos are always beautifully edited!
Stef, thanks so much! So kind of you to say so. The brush feature is probably my favorite aspect of editing, if I need it on a photo. The radial gradient is my next go-to! I have fun seeing what I can turn pictures into. Glad you enjoyed, thanks again!
Thanks so much for sharing your knowledge, Charli! I’m a MASSIVE fan of your photos and always think you do such an amazing job on them so it’s awesome knowing a little bit more about how you get the end results! I’m definitely not a fantastic photographer but it’s cool to know you can get your shots looking this amazing primarily through editing. I know this isn’t a post about how to shoot photos, but – do you mostly take your own photos (using a tripod)? or do you have your other half acting as your photographer?
Joannda, thank you! Happy to share if it can help people find their editing style 🙂 It took me so long to find what I like but I’m finally getting that down pat! And my other half always shoots my photos for me! He was a complete newb in the beginning too but we’ve both grown photography-wise and we have fun collaborating on the photos!